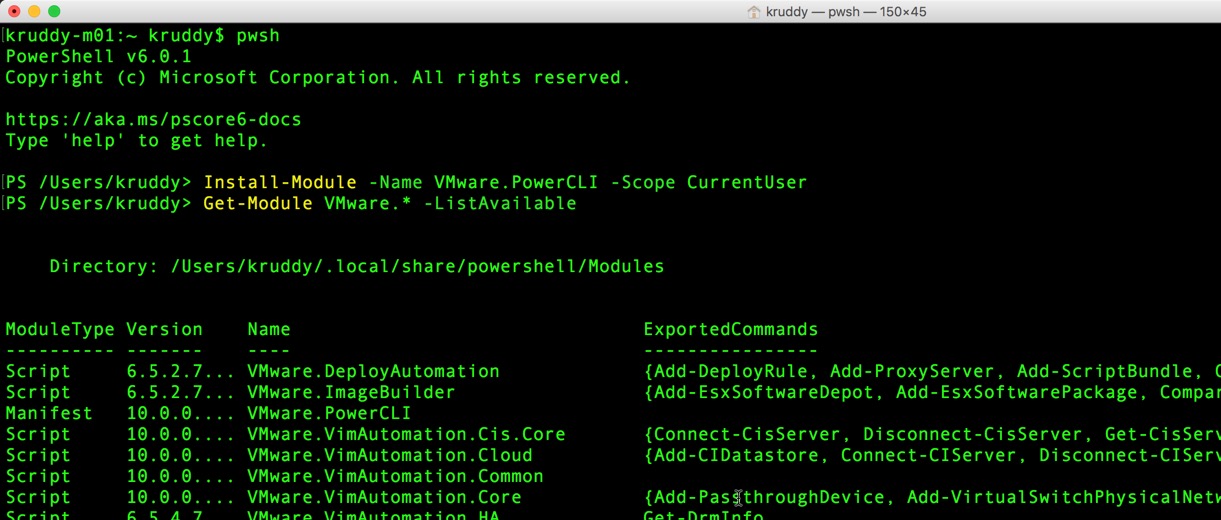
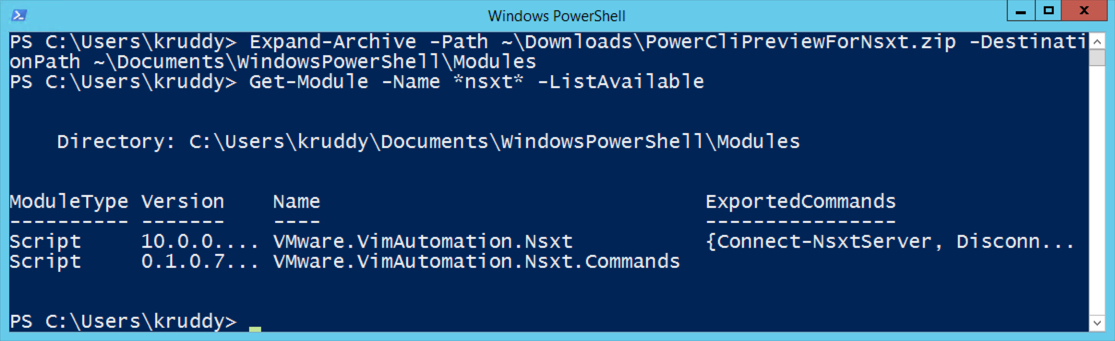
PowerCLI 6.5.3 was released a few short weeks ago and one of the biggest additions was the module to manage VMware NSX-T! This version of NSX provides network virtualization to not only VMware environments, but also multi-cloud and multi-hypervisor environments too.
Before diving into the module itself, there are a couple things we should cover first. This module was released as a low-level, API access only, module. That means the module comes with the following cmdlets: Connect-NsxtServer, Disconnect-NsxtServer, and Get-NsxtService. The first two cmdlets should be fairly straight forward, but the third is where it gets interesting. The Get-NsxtService cmdlet allows us to have full access to NSX-T’s public API! This module also gives users the capability to use a ‘create’ method to create PowerShell objects. These objects can then be modified and used as input back to the endpoint. This really helps simplify and streamline the interaction between PowerCLI and the NSX-T API endpoint!
For more information about the NSX-T 2.0 release, see the Network Virtualization blog: NSX-T 2.0 is Here!
For more information about the NSX-T 2.0 API, see the VMware Code API Explorer
Getting Started
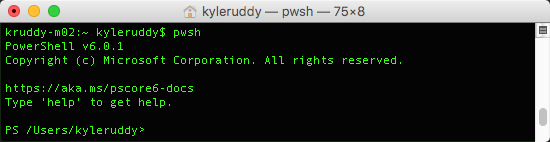
First things first, open up a PowerShell session and authenticate to your NSX-T Manager with the ‘Connect-NsxtServer’ cmdlet.
Output Example:
![Connect-NsxtServer Example]()
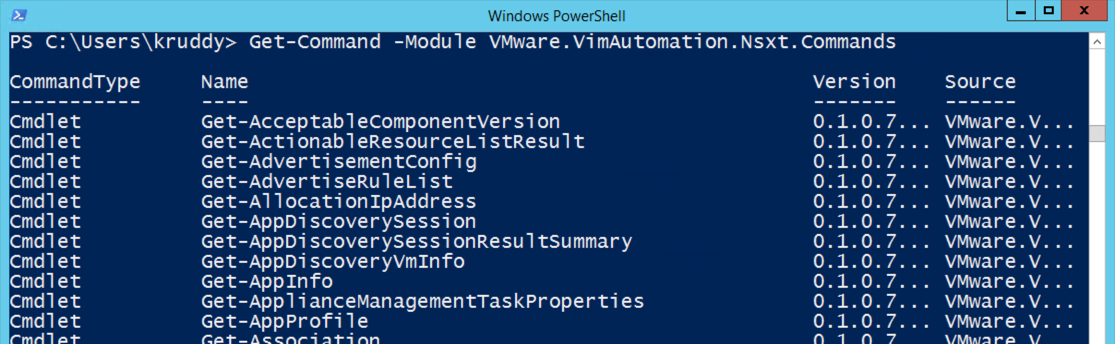
We are now ready to start exploring the NSX-T API with the ‘Get-NsxtService’ cmdlet. Running that cmdlet as is will return every named call for the NSX-T API, so this may be a little overwhelming at first. To make this easier, remember to reference the API Explorer as well as PowerShell’s ‘where-object’ cmdlet to help filter the names for what you need.
Example: Getting NSX-T Manager Information
For the first example, we are looking for information about the NSX-T Manager node. Searching through the VMware Code API Explorer for NSX-T for ‘nsx manager appliance’, we see a ‘GET’ method against ‘/node’ that is probably the most relevant call.
![NSX-T API Explorer Example]()
To consume this in the PowerCLI module, we will use the ‘Get-NsxtService’ cmdlet to search for a name that ends in ‘node’ with the following code:
Get-NsxtService -Name *node
We can then save that service in a variable to easily reference for future commands:
$nodeSvc = Get-NsxtService com.vmware.nsx.node
We can now explore the methods available by piping the ‘nodeSvc’ variable to PowerShell’s ‘Get-Member’ cmdlet. Example:
$nodeSvc | Get-Member
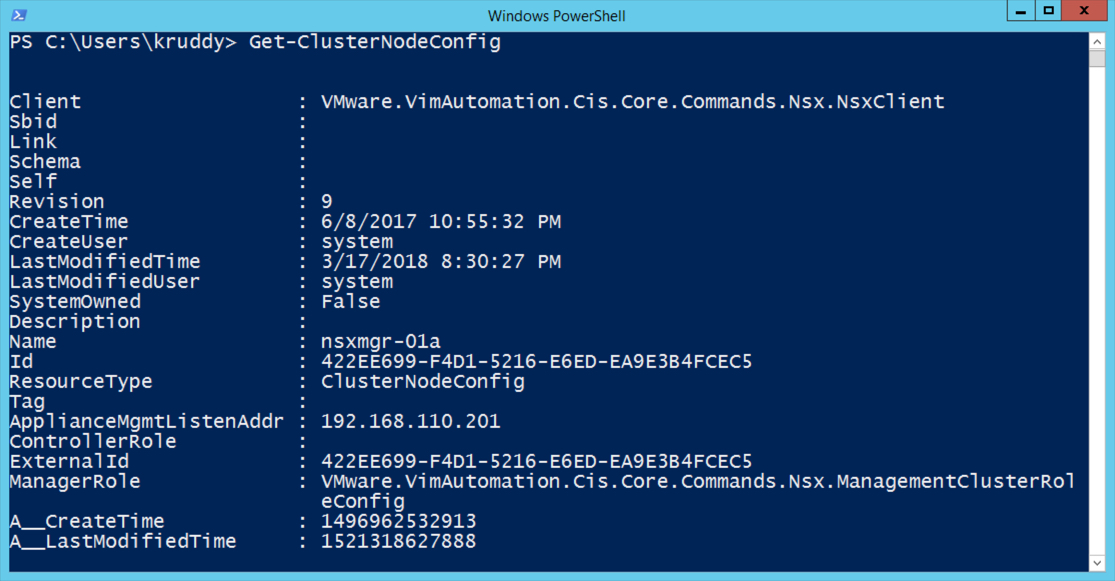
There, In the output from ‘Get-Member’, we will see a ‘get’ method. We’ll want to perform that with the following code:
$nodeSvc.get()
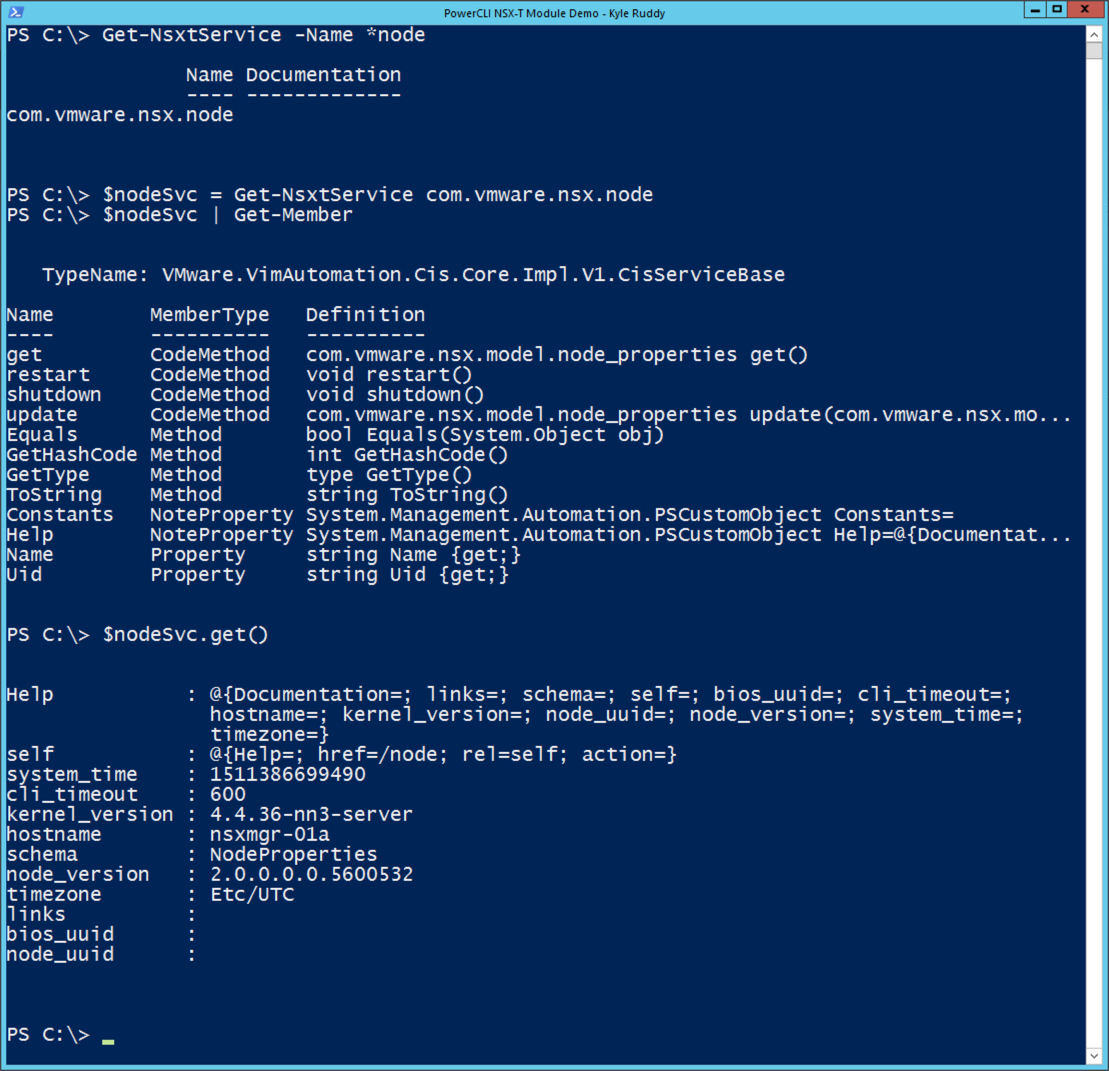
Combined Command Example:
Get-NsxtService -Name *node
$nodeSvc = Get-NsxtService com.vmware.nsx.node
$nodeSvc | Get-Member
$nodeSvc.get()
Output Example:
![NSX Manager Node Information Retrieval Example]()
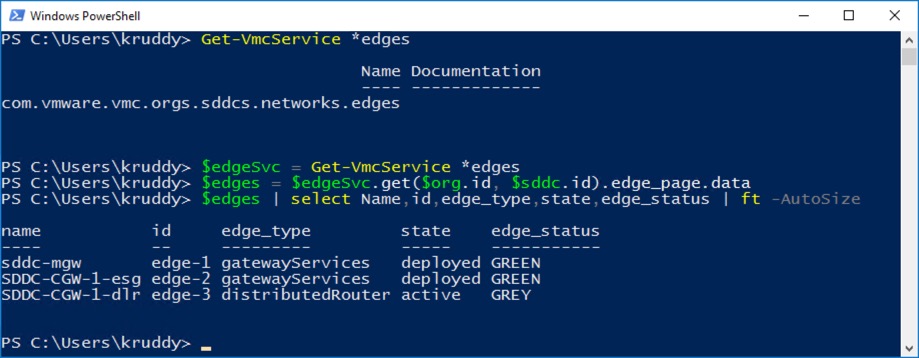
Example: Retrieve Transport Zone Information
In our second example, we will retrieve information about the configured Transport Zones. We can do this as easily as we did the NSX Manager node. Referring back to the VMware Code API Explorer for NSX-T, we can search through the available namespaces for ‘transport zones’. We’ll find one in particular that has a description of ‘List Transport Zones’.
Based on that information we can infer that the service name is going to end in ‘zones’. We’ll run the following command to find the service:
Get-NsxtService -Name *zones
We’ll then store the ‘com.vmware.nsx.transport_zones’ service into a variable. We’ll pipeline that variable to the ‘Get-Member’ cmdlet to find the available methods we can use. An example:
$tZoneSvc = Get-NsxtService -Name com.vmware.nsx.transport_zones
$tZoneSvc | Get-Member
This service offers a couple methods which could fit our scenario of retrieving information about the environment’s Transport Zones. The methods available are a ‘get’ and a ‘list’. In order to perform the ‘get’, we would need to have the ID. Since we don’t have that information yet, we’ll run the ‘list’ method and store that into a variable with the following command:
$tZones = $tZoneSvc.list()
Refering to the ‘tZones’ variable we can see some information, but the info about the Transport Zones themselves are within the ‘results’ property. We can refer back to the ‘tZones’ variable but specifying the ‘results’ property and find the information we’re looking for.
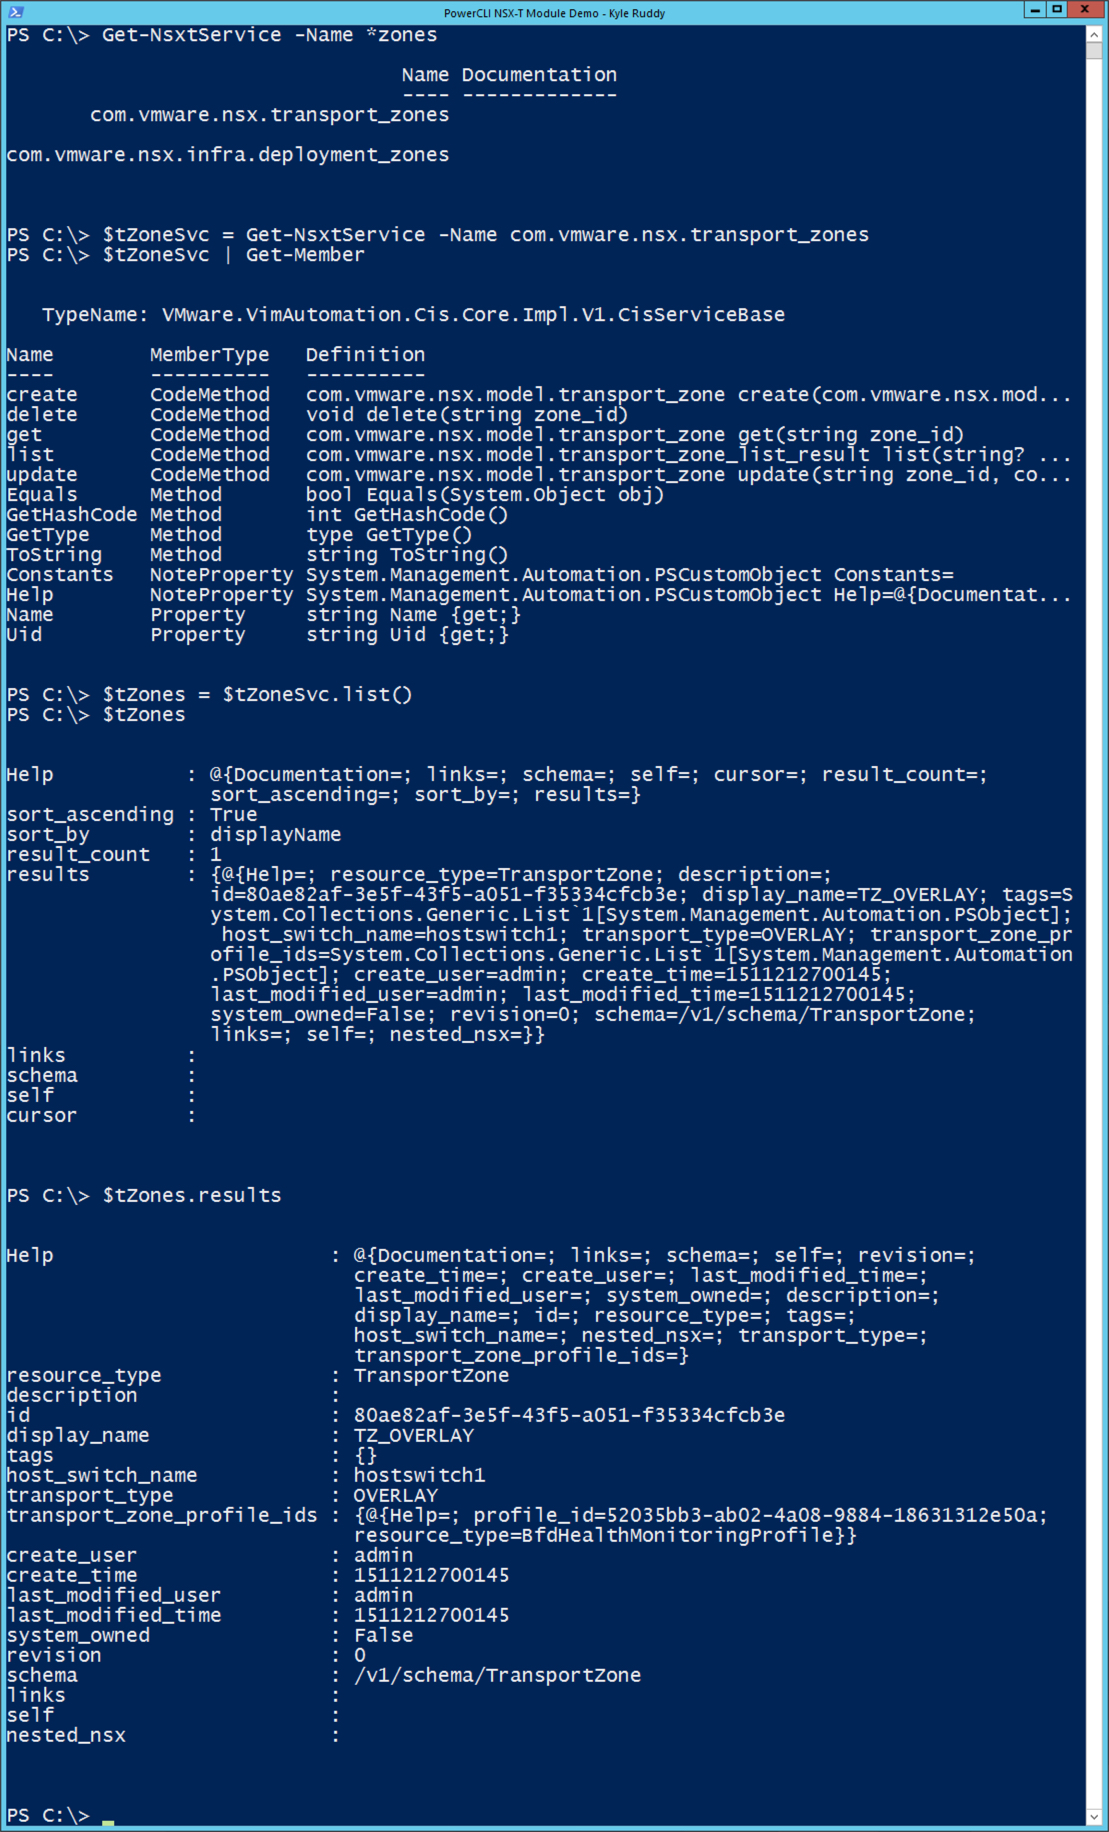
Combined Command Example:
Get-NsxtService -Name *zones
$tZoneSvc = Get-NsxtService -Name com.vmware.nsx.transport_zones
$tZoneSvc | Get-Member
$tZones = $tZoneSvc.list()
$tZones.results
Output Example:
![Transport Zone Example]()
Example: Logical Switch Management
We have now covered much of the basics on how to get started, so let’s start doing some other tasks. In this example, we are going to list out the Logical Switches and then create a new one!
First, we’ll retrieve information about our existing Logical Switches using the knowledge we built from the first two examples. This can be done with the following commands:
Get-NsxtService -Name *switches
$logSwitchSvc = Get-NsxtService -Name com.vmware.nsx.logical_switches
$logSwitchSvc | Get-Member
$logSwitches = $logSwitchSvc.list().results
$logSwitches
Referring back to the output from the ‘Get-Member’ cmdlet, we noticed a ‘create’ method was available. This is where the ‘Help’ property is going to become very important. We can obtain some additional information about the requirements of the ‘create’ method by calling the variable’s ‘help’ property. We can also target the help for our example by further calling the ‘create’ property. We can do that with the following command:
$logSwitchSvc.Help.create
The output includes a lot of valuable information such as the required and optional parameters, expected output, potential errors, and so forth. The last property, ‘logical_switch’, is the important one. We can refer to this as the structure the ‘create’ method is looking for. We can take that a step further and actually create a specification based off of that information as well with the command:
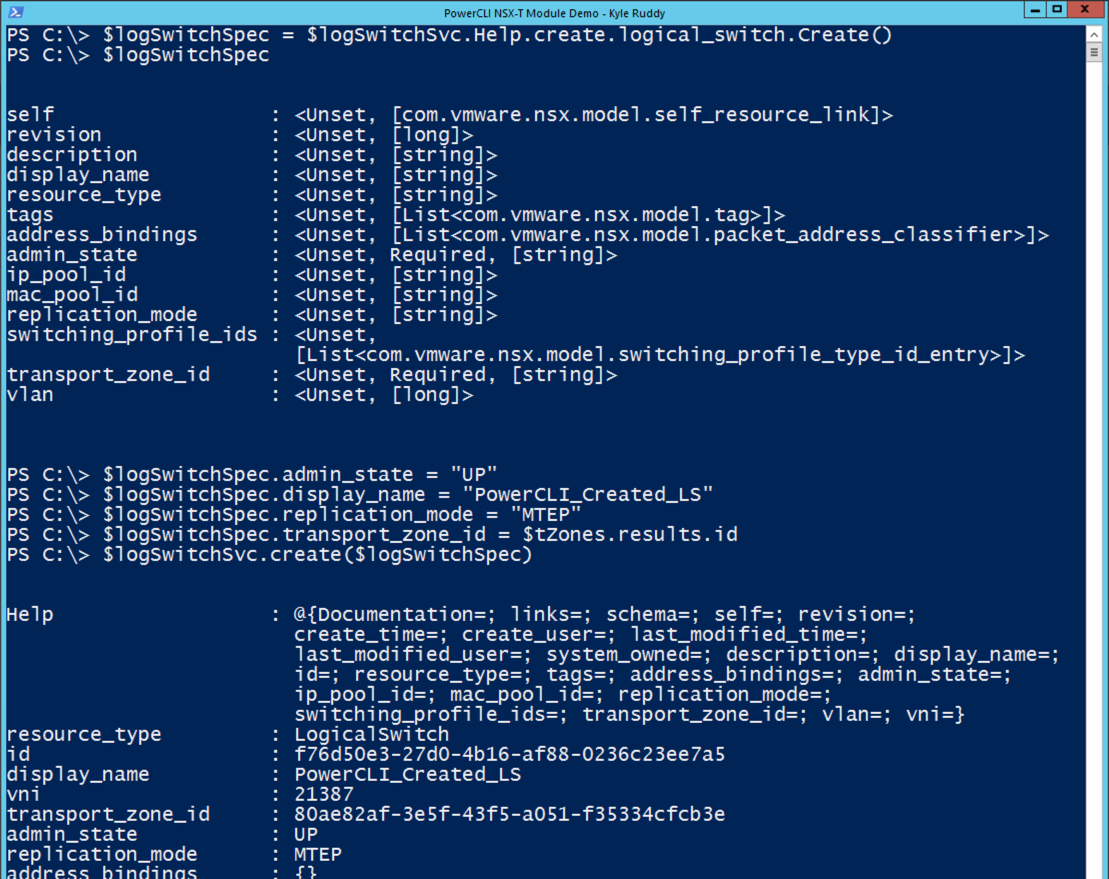
$logSwitchSpec = $logSwitchSvc.Help.create.logical_switch.Create()
Checking the output of the variable ‘logSwitchSpec’ we can now see a PowerShell object that can be modified to be included as part of our ‘create’ action. The required parameters are the Logical Switch name, Transport Zone ID, and admin state. However, since this is an overlay logical switch, we can also specify the replication mode as noted in the ‘Help’ output. We can make those modifications with the following commands:
$logSwitchSpec.admin_state = "UP"
$logSwitchSpec.display_name = "PowerCLI_Created_LS"
$logSwitchSpec.replication_mode = "MTEP"
$logSwitchSpec.transport_zone_id = $tZones.results.id
Lastly, we will run the original ‘create’ method against the ‘logSwitchSvc’ variable. Example command:
$logSwitchSvc.create($logSwitchSpec)
Combined Command Example:
$logSwitchSvc = Get-NsxtService -Name com.vmware.nsx.logical_switches
$logSwitches = $logSwitchSvc.list().results
$logSwitchSpec = $logSwitchSvc.Help.create.logical_switch.Create()
$logSwitchSpec.admin_state = "UP"
$logSwitchSpec.display_name = "PowerCLI_Created_LS"
$logSwitchSpec.replication_mode = "MTEP"
$logSwitchSpec.transport_zone_id = $tZones.results.id
$logSwitchSvc.create($logSwitchSpec)
Example Output:
![Logical Switch Creation Example]()
Example: IP Pool Management
The last example will be taking a look at managing IP Pools.
Much like the prior examples, we’ll start by retrieving information about the existing IP Pools with the following commands:
$ipPoolSvc = Get-NsxtService -Name com.vmware.nsx.pools.ip_pools
$ipPools = $ipPoolSvc.list().results
$ipPools
However, we’d like the output to be a little more readable and include information which is nested within a property. This can be accomplished by using PowerShell’s ‘Format-Table’ cmdlet. We will take the ipPools variable output and pipeline that into the ‘Format-Table’ cmdlet. There we can use the ‘property’ parameter to specify only the properties that we are concerned with viewing.
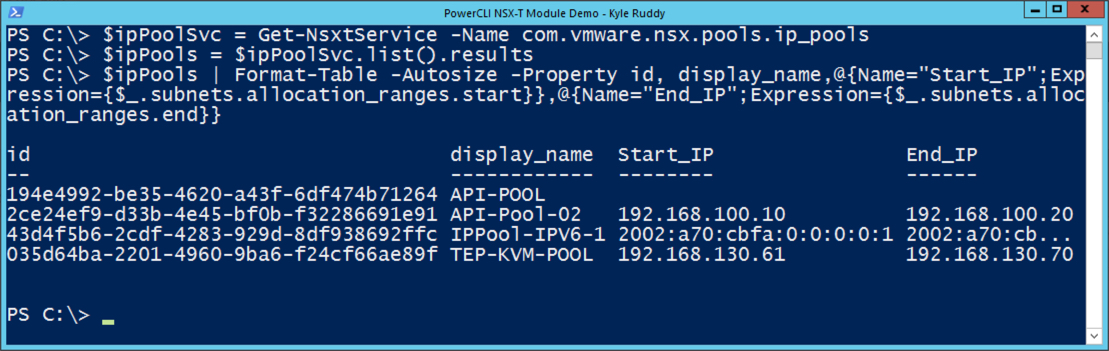
Command Example:
$ipPools | Format-Table -Autosize -Property id, display_name,@{Name="Start_IP";Expression={$_.subnets.allocation_ranges.start}},@{Name="End_IP";Expression={$_.subnets.allocation_ranges.end}}
Output Example:
![IP Pool Information Retrieval Example]()
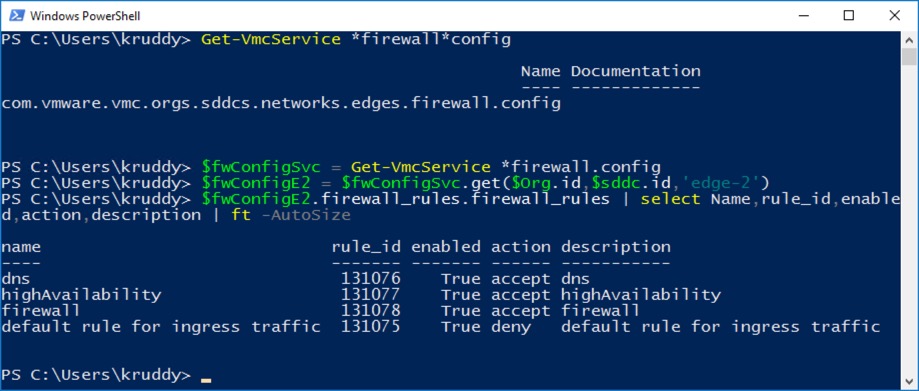
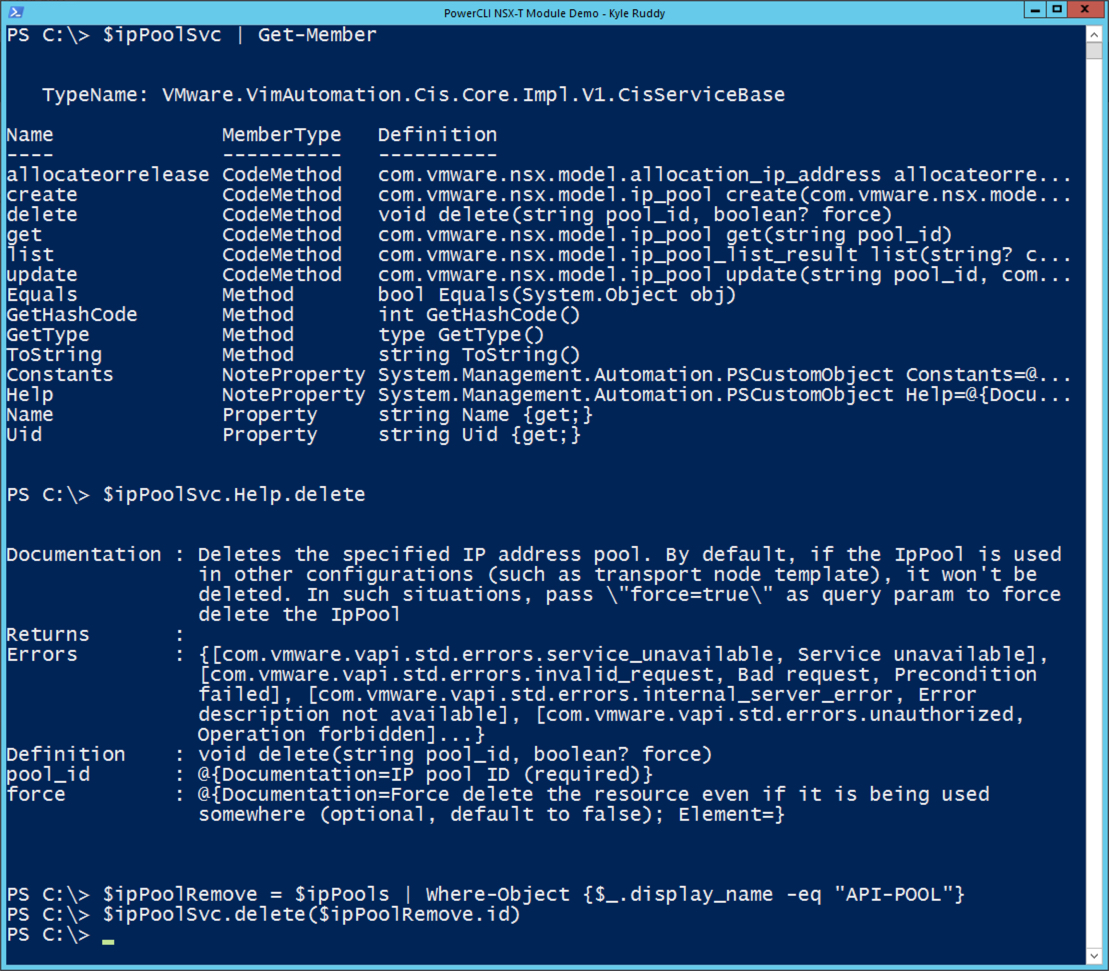
With our custom output, we realize there happens to be an IP Pool which doesn’t have any IPs assigned to it. We’ll want to remove that IP Pool so someone doesn’t try to use it. Performing a ‘Get-Member’ against the ipPoolSvc variable, we see there’s a ‘delete’ method we can use to remove that unneeded IP Pool. To find more information about what the method requires, we can call the ipPoolSvc’s ‘Help’ property and even further specify the ‘delete’ property. There we can see the IP Pool’s ID is the only required input while the ‘force’ input is optional. We are then ready to use the ‘delete’ method with the following commands:
$ipPoolSvc | Get-Member
$ipPoolSvc.Help.delete
$ipPoolRemove = $ipPools | Where-Object {$_.display_name -eq "API-POOL"}
$ipPoolSvc.delete($ipPoolRemove.id)
Output Example:
![IP Pool Removal Example]()
Summary:
PowerCLI 6.5.3 introduced a great new module to manage VMware NSX-T environments. In the NSX-T module’s current release, it has three cmdlets to connect and disconnect from the NSX Manager while the third is used to interact directly with the NSX-T API. This blog post went through several examples including retrieving information about the NSX Manager node, Transport Zones, Logical Switches, and IP pools. We then took a look at using the API access to create a logical switch and remove an IP Pool.
Let us know in the comments how you’re using the NSX-T module to manage your environment!
The post Getting Started with the PowerCLI Module for VMware NSX-T appeared first on VMware PowerCLI Blog.


 Jake
Jake